If you are a solar PV installer, you have probably noticed that more and more clients ask you how to prevent pigeons and other birds from nesting under the panels. In this article, we explain how to integrate BirdBlocker into your projects, with practical examples based on the type of roof.
Why BirdBlocker is interesting for PV installers
- Panel-friendly solution: it attaches to the module frame without drilling, fully respecting the manufacturer’s warranty.
- Easy installation: mounted with clips and polypropylene strips; no special tools required. No need to dismantle the panels.
- Reduces service calls: robust solution that prevents noise, dirt, production losses, and nests under the installation.
- Compatible with most panels and structures: tiled roofs, sandwich/metal roofs, and flat roofs with ballast systems.
- Enhances your service offering: cleaning + BirdBlocker installation + periodic inspections as an additional service.

BirdBlocker: the solution against nests under solar panels
Before you start: basic planning
Before installing BirdBlocker, it is important to carry out a quick inspection of the PV system and the surrounding area:
- Check whether there are active nests under the panels (twigs, feathers, droppings, noise).
- Confirm who is responsible for cleaning and nest removal (end client, maintenance company, pest control specialists).
- Measure the perimeter of the PV array: total length of open sides to calculate the meters of BirdBlocker required.
- Check access: roof conditions, anchor points, safety lines or any required safety measures.
Once the scope is clear (cleaning + BirdBlocker installation) and you know the total linear meters to protect, you can order the material and plan the intervention.
Recommended material and tools
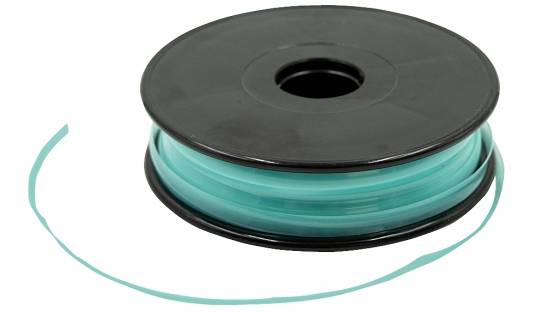
- BirdBlocker (polypropylene strips supplied in 10 m or 30 m boxes, including standard clips and cable ties for installation).
- BirdBlocker BB Installation Tool, specially designed to make the process not only faster but significantly more comfortable, with a more professional finish. Although BirdBlocker can be installed by hand, we strongly advise against it. The BB tool prevents injuries, speeds up installation, and ensures a better grip on the panel frame.
- BB-BoxClip-50s fixing clips, required only for box-design module frames—those without a lower lip on the short sides. If the panel does have a lower lip, the standard clips included with the BirdBlocker boxes are enough. For box-design frames, additional clips with the correct height and width are required (typically 30–35 mm height and 8–13 mm or 14–18 mm width). If unsure, send us the technical datasheet and we will tell you exactly which clips you need.
- Measuring tape and marker for cut alignment.
- Pruning shears or cutting pliers to trim the BirdBlocker strips. Because polypropylene is highly resistant, pruning-style shears offer cleaner, easier cuts compared with flat-blade scissors.
- Work gloves (edges, profiles, and structures may be sharp).
- PPE for working at height: harness, helmet, lifeline, etc., depending on the site.
Choosing the correct BirdBlocker model (BB125 vs BB200)
The correct BirdBlocker model depends entirely on the free height between the panel frame and the roof surface. As a general rule:
- BB125 → choose this model when the free height is less than 12 cm.
- BB200 → required when the free height is in the 12–19 cm range.
There is also a third model, BB85, designed for very low-mounting systems (e.g., certain metal roofs or sandwich panels with minimal clearance). It is not listed on the online shop because it is less common and many installers simply use BB125 and trim it if necessary. If you need BB85 for a specific project, you can contact our technical team and we will supply it.
BirdBlocker installation: general procedure
Although every roof has its particularities, the BirdBlocker installation process normally follows the same overall logic. Below is a general framework you can adapt to each project. You will also find a playlist with all the installation videos so you can clearly follow every step:
- Measure the perimeter to be protected.
Identify which sides of the PV table or array are accessible to birds (edges, lateral sides, areas near eaves, etc.) and calculate the total linear meters that need to be closed. Keep in mind that you will always need a few extra meters due to material loss on corners. - Select the correct BirdBlocker model.
Choose between BB125 or BB200 depending on the free height between panel frame and roof surface. If unsure, measure the lowest point beneath the panel and compare it with the maximum cap height. - Prepare the area.
Before installation, perform a complete cleaning beneath the panels: remove nests, feathers, debris, droppings, and organic material. - Plan the sections.
Divide the perimeter into straight sections and corners. Mark where you will need to cut the strips and how to handle transitions (corners, level changes, flashings, and roof details). - Attach the clips to the strips.
Pre-assemble the strips by installing the clips before going up to the roof. Use 4 clips per strip.
Remember: clips are not symmetrical—the BirdBlocker logo must face upwards, visible once positioned on the strip teeth. - Plan the installation order.
Start at the corner furthest from the roof access point and work in both directions from there.
Important: always finish each row by placing the corner strip first before attaching the final straight strip. This ensures proper length and a tight, professional finish. - Fix the strips to the panel frame.
Hold the BB tool behind the clip while keeping the strip parallel to the panel frame.
Slide the strip under the panel until the clips hook onto the lower lip of the frame.
Pull the strip fully over the aluminum lip. Repeat with all four clips until the entire strip is firmly secured. - Cut and resolve corners.
Trim BirdBlocker strips to fit the corner geometry.
– Use a straight cut for internal corners.
– Use a 45° miter cut for external corners.
Always cut on the last segment of the strip and add an extra clip before and after the corner for additional strength. - Connect the strips.
Close any small openings between the teeth of adjacent strips. There must be no gaps where a bird could enter.
You may connect strips:- Using cable ties (included). Install diagonally (one side above, one below), tighten firmly, cut the excess, and rotate the locking head for a clean finish.
- Without cable ties, by weaving the last tooth of one strip into the adjacent strip.
- Inspect corners and complex areas.
Pay special attention to corners, height changes, flashings, and cable entry points—these are the most common locations for unnoticed gaps. - Check drainage and ventilation.
Ensure that BirdBlocker does not obstruct drainage lines or critical ventilation points of the roof or PV structure. - Final inspection.
Do a complete visual check of the entire perimeter before leaving the roof.
If possible, perform a joint walkthrough with the client or document everything with photos, explaining the protected perimeter and future maintenance recommendations.
Roof-specific considerations
Each roof type presents different challenges when installing BirdBlocker. Below is a summary of the most common cases and which BirdBlocker model usually fits best. In any case, your main reference should always be the actual height of the gap beneath the panels.
- Flat tile roofs, asphalt shingle roofs, or slate roofs. These are generally low-profile roofs with low mounting systems, creating a very attractive gap for pigeons and small birds.
In most installations, the recommended model is BB125. - Curved tile roofs / Mediterranean tile roofs. These roofs have a large height difference between the highest and lowest points of the tile. Panels are usually mounted on the higher crest to maintain waterproofing, meaning BirdBlocker must bridge a significant height difference.
In many cases, the most suitable model is BB200. - Ceramic tile roofs with adjustable hooks. Some systems allow the hook height to be adjusted for ventilation.
– If mounted very low, BB125 is typically sufficient.
– If the structure is raised and the gap increases, BB200 may be required. - Sandwich panels and trapezoidal metal roofs. With direct mount or clamp-based systems, the panel usually sits very low, leaving a narrow gap ideal for nesting.
For these very low heights, the manufacturer created the BB85.
When the height increases (e.g., with minirails), the usual choice is BB125.
If you work frequently with this type of roof and are unsure, you can consult us and we will help you choose the right model. - Corrugated metal or corrugated fibre-cement roofs. When panels are mounted directly on the crest of the corrugation, the gap is typically extremely low, making BB85 the right model for this application.
If the mounting system provides additional height (minirail or rail), installers often use BB125. - Trapezoidal roofs with minirail or full rail systems. Clamps or minirails usually raise the panel slightly, making BB125 suitable in most cases. However, in full-rail systems or on industrial roofs with higher structures, BB200 may be necessary.
In short: always use the actual gap height under the panel as your primary criterion, and the roof type as a secondary reference.
Common mistakes to avoid
- Leaving open gaps at corners or height transitions (birds find these quickly).
- Installing BirdBlocker without cleaning first (nests, droppings, organic debris).
- Incorrectly attaching the clips, causing strips to come loose with wind or vibration.
- Blocking drainage points or essential ventilation areas on the roof.
- Using improvised DIY solutions (mesh, wires, plastic) that can damage the panel and are not durable.
Maintenance and inspections
Once BirdBlocker is installed, maintenance is minimal, but it is advisable to agree with the client on a simple inspection plan:
- 1 annual inspection (a quick 15–20 minute visit) to check the perimeter.
- Additional inspection if the client reports noises, debris, or drops in production.
- Replacing damaged sections if work is carried out on the roof or PV system afterwards.
How to include BirdBlocker in your project quotes
Adding BirdBlocker to your proposals is an easy way to deliver more value to clients and differentiate yourself from other installers:
- Add a dedicated line item in your quote: cleaning/removal of nests (if applicable) + BirdBlocker supply and installation.
- Explain the production benefits: less dirt, fewer health risks, lower fire risk, less shading, fewer incidents.
- Propose BirdBlocker from the very beginning. We recommend installing it preventively, ideally right after mounting the panels—especially on roofs with visible bird activity (pigeons, sparrows, starlings).
It helps to present BirdBlocker as a long-term preventive protection, not just an optional add-on.
BirdGard Iberia as a BirdBlocker supplier for installers
Working with BirdGard Iberia allows you to offer a faster, more reliable and more profitable service. Here is what we provide:
- Special installer pricing: stable professional conditions with no surprises. Contact us.
- Permanent stock availability: we always have units in stock, so you don’t need to keep inventory. Buy only the material you need—no capital tied up, no pallets sitting in your warehouse.
- Ultra-fast delivery (24–48 h): daily shipments, with priority for professional orders so your projects never stop.
- Technical support: we help you calculate perimeter length, solve installation questions, and plan projects.
- Real after-sales assistance: if any issue arises (installation, clips, compatibility, maintenance), we support you directly.
- Personalised attention: direct phone and email support for urgent orders.
- Easy to quote: we guide you on how to include BirdBlocker in your proposals to stand out from your competitors.
- On-site assistance (remote): if questions arise during installation, we can guide you by phone or provide technical documentation.
In short: with BirdGard Iberia you get stock, speed, support and experience. That means fewer issues, less time wasted, and more satisfied clients.
Next steps
If you want to start offering BirdBlocker in your PV installations, begin by testing it on one or two projects where bird activity is already an issue or risk factor. From there, it’s easy to include it as part of your standard offering.